MindMup Cloud storage allows Gold users to save private maps, share and collaborate with other Gold users. This guide explains how to perform the most common operations with maps on MindMup Cloud.
- Signing into MindMup Cloud
- Creating a new map
- Opening existing maps
- Creating copies of maps
- Restoring old versions from history
- Sharing maps
- Working with team maps
- Deleting and un-deleting maps
- Disabling MindMup Cloud
- Moving files from Google Drive to MindMup Cloud
Signing into MindMup Cloud
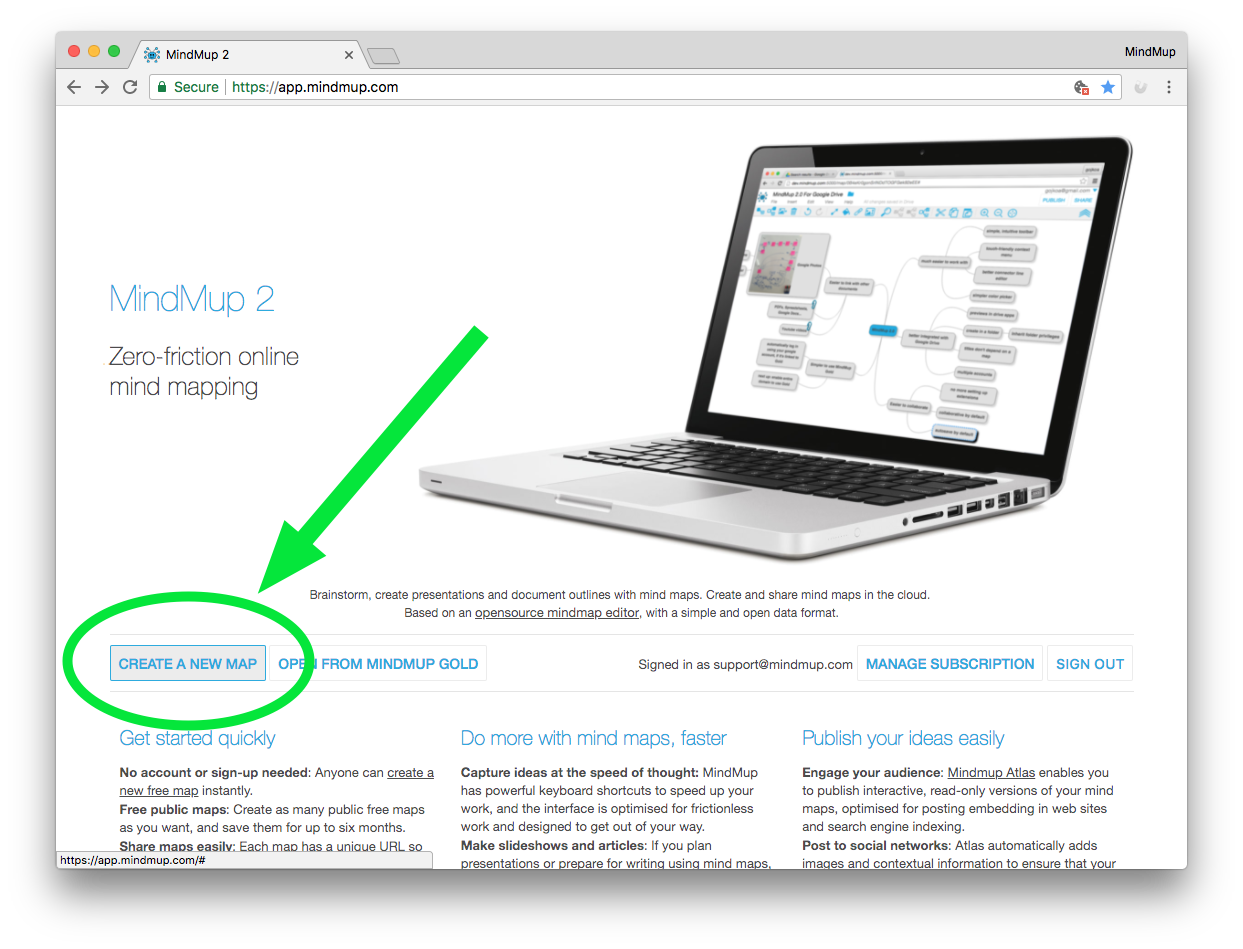
The easiest way to ensure you’re using MindMup Cloud is to sign into the application from https://app.mindmup.com. Bookmark that as your MindMup landing page and you’ll be able to access your maps conveniently later.
Alternatively, you can also access these features from the main https://www.mindmup.com web site, by clicking on the Get Started button, selecting MindMup Cloud as the storage option, then clicking on Create a new map or Open an existing map.
Creating a new map
The easiest way to create a new map is to:
- Go to https://app.mindmup.com
- ensure you are signed into your Gold account (click
Sign Inif not signed in) - click the
Create a new mapbutton
You can also create a new map while editing any other map, by clicking the File > New button from the main application menu.
Opening existing maps
The easiest way to open an existing map is to navigate to https://app.mindmup.com. Ensure you are signed into your Gold account (click Sign In if not signed in), then click the Open from MindMup Gold button.
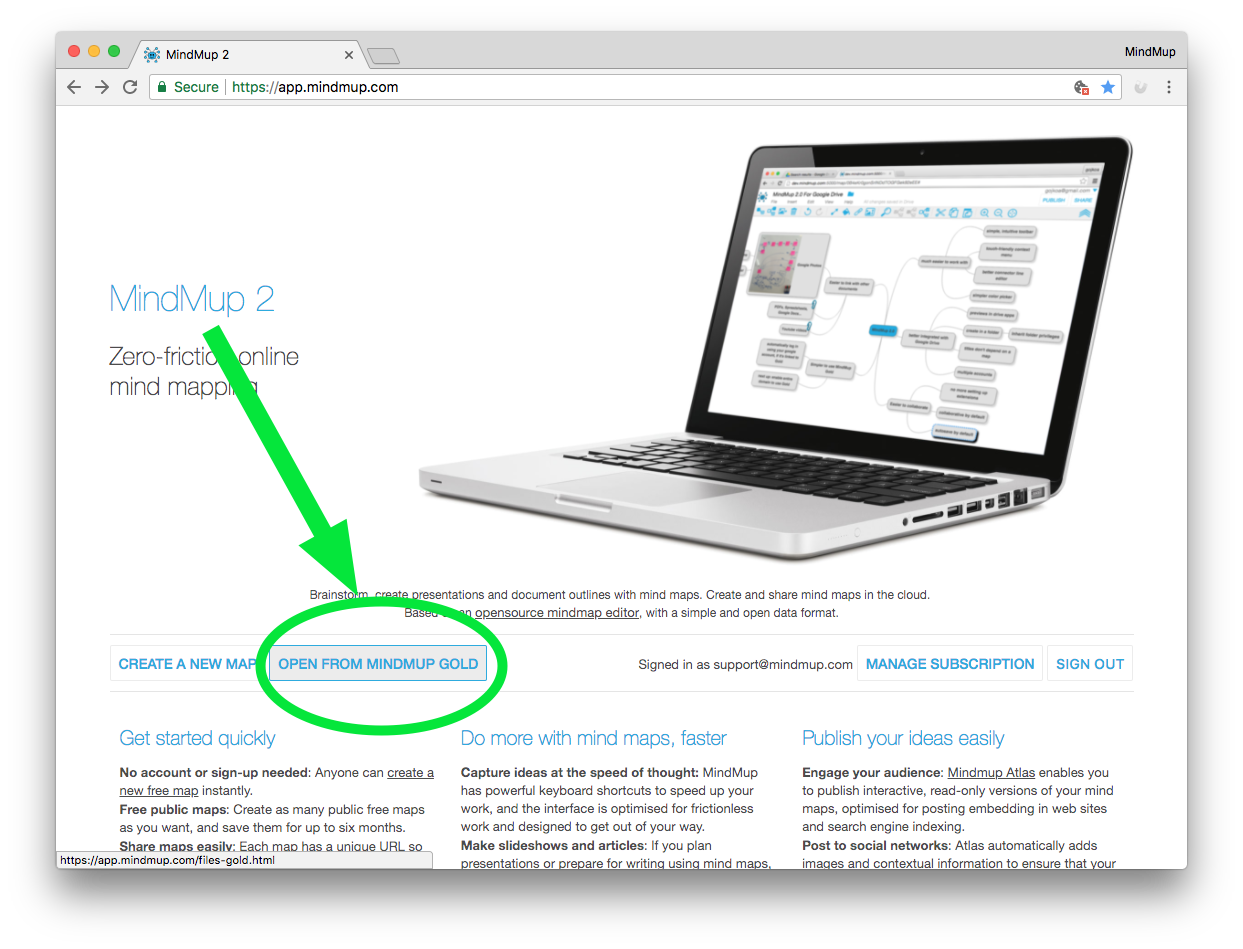
Alternatively, you can bookmark https://app.mindmup.com/files-gold.html in your browser, and navigate directly to this page.
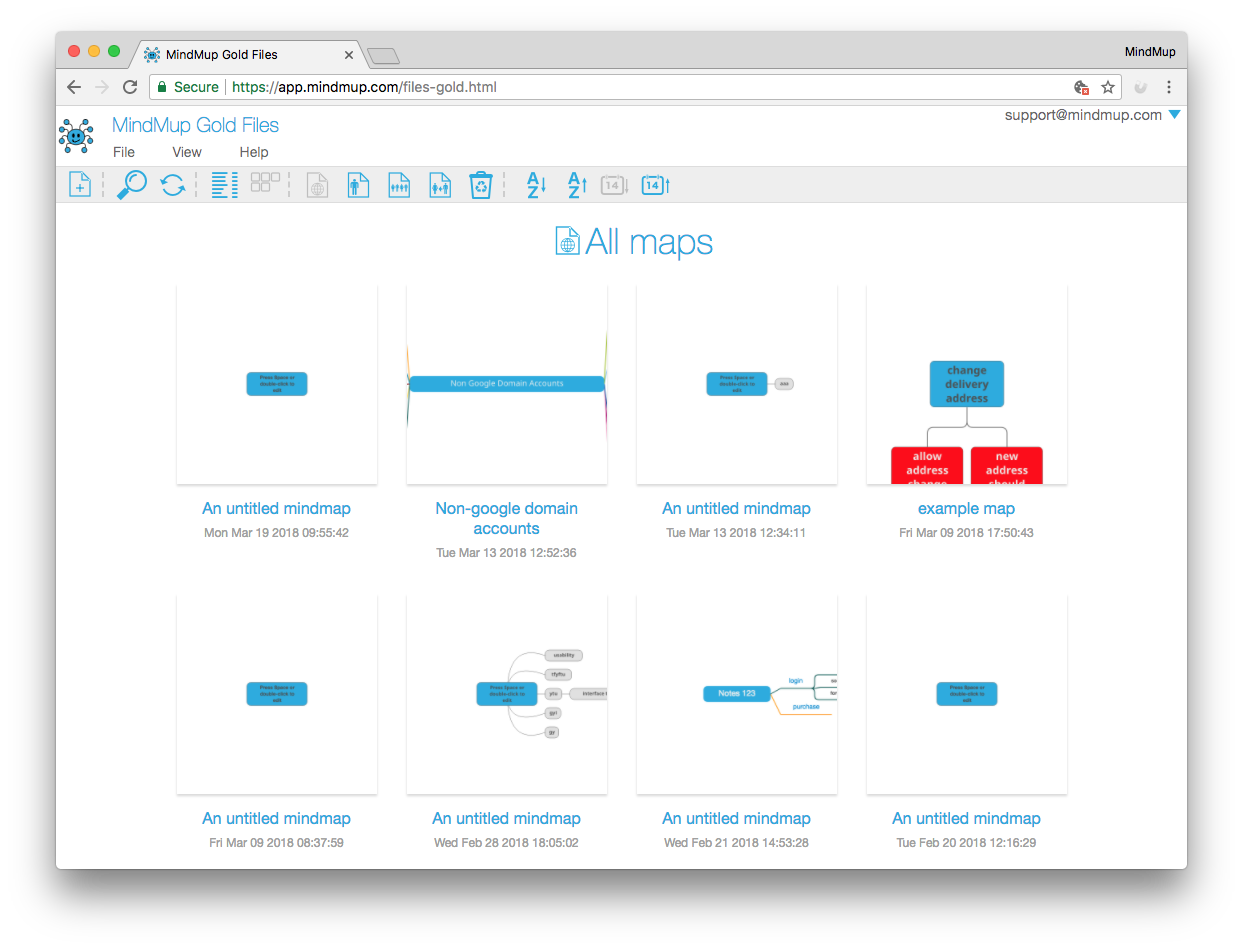
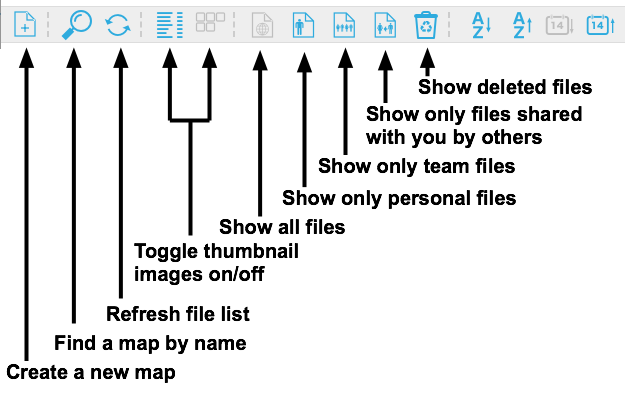
The file management screen shows your maps, along with a quick preview so you can easily identify them. Use the main application menu, or the toolbar, to customise the view. You can switch from all files to only files created personally by you, or shared within your team. You can also remove thumbnails from the view to display more files on a smaller screen, and display the list in various order.
Creating copies of maps
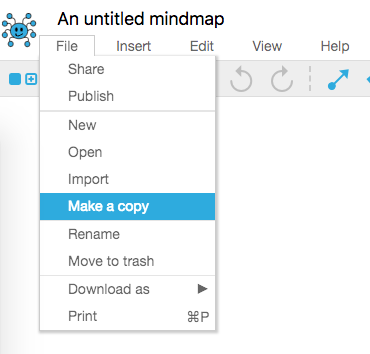
You can easily create a copy of an existing map by using File > Make a Copy while editing the map. Creating a copy clones the content, but not the history of changes, so the copy starts with a clean history. This is convenient if you want to share the final results of a mapping session, without sharing how you got there – for example to share an assignment with students without giving away the results.
Restoring old versions from history
Maps stored to MindMup Cloud, since 1 March 2018, keep a history of changes. You can quickly see how your ideas evolved, who changed what and when, and also restore an older version of your map in case of problematic changes.
You can view a list of changes in a sidebar by clicking on the History button in the top right corner, or the View > Sidebar > Toggle History.
Double-click any entry in the history list and you will open an interactive history explorer, showing the map as it was at the time of that event. You can also open the interactive history explorer directly, using the File > Version History option from the main application menu.
In the history explorer, you can drag the handle on the top progress bar to move through the history of changes, or click on an event in the right-hand sidebar to view the map at a particular time in history.
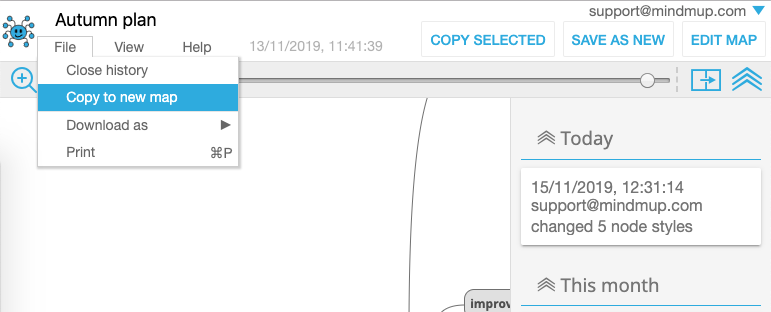
If you want to restore this history state to a new editable map, click the Save as New button in the top-right corner, or use File > Make a copy option from the main application menu in history view mode.
To undo smaller changes, you can select any node in a historical view and copy it (and its children) to the clipboard using the Copy Selected top-right button (or you can just use the usual clipboard keyboard shortcuts for your operating system). You can then paste this node back into original map.
To go back to the original map, use the Edit Map button in the top-right corner.
Sharing maps
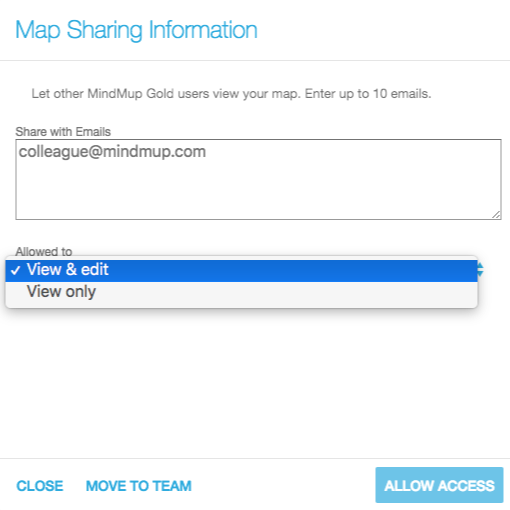
MindMup Cloud enables Gold users to concurrently edit maps and collaborate. You can share a map with other users by clicking the Share button in the top-right corner while editing a map, or selecting the File > Share option from the main application menu.
Just enter the e-mails of people you would like to share the map with (up to 10 at a time), and choose whether they should be able to just view the map, or collaborate with you on editing. Click the Allow access button to confirm, and the collaborators will get an e-mail with instructions on how to access your map.
You can easily find maps shared by other people in your files by clicking on the Shared with me toolbar icon.
If you would like to revoke sharing privileges from someone later, open the map sharing dialog again, and click on the trash icon next to their e-mail.
Organisational administrators can restrict sharing to people just within the same organisation, or allow maps to be shared with people outside the organisation as well. Check out Controlling organisational access for more information.
Working with team maps
In addition to maps shared with individual users, you can easily share a map with groups, or even with everyone in your organisation. This is useful if you want to avoid individual ownership of data, or for small teams where everyone should have easy and convenient access to all the information.
To turn a personal map into an organisational map (so everyone has full access to it), open the sharing dialog by clicking on the Share button in the top-right corner, then click the Move to team button in the dialog.
You can easily find team maps in your files by clicking on the Team maps toolbar icon.
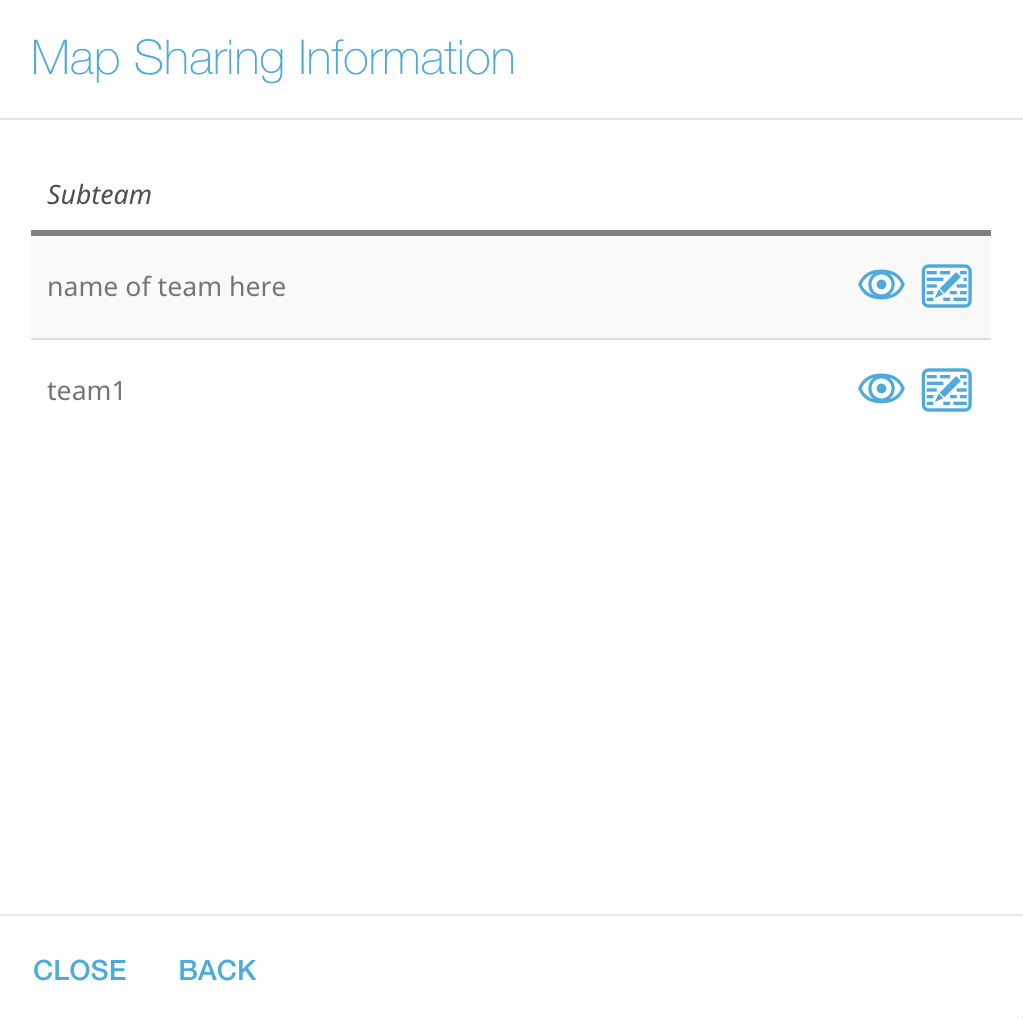
Account administrators can also create subgroups (for example, for people working on a project, or a class of students). To share a map with a team, select the Add subteam button in the pop-up sharing dialog. (Check out the Manage sharing teams for instructions on how to create and manage group members.)
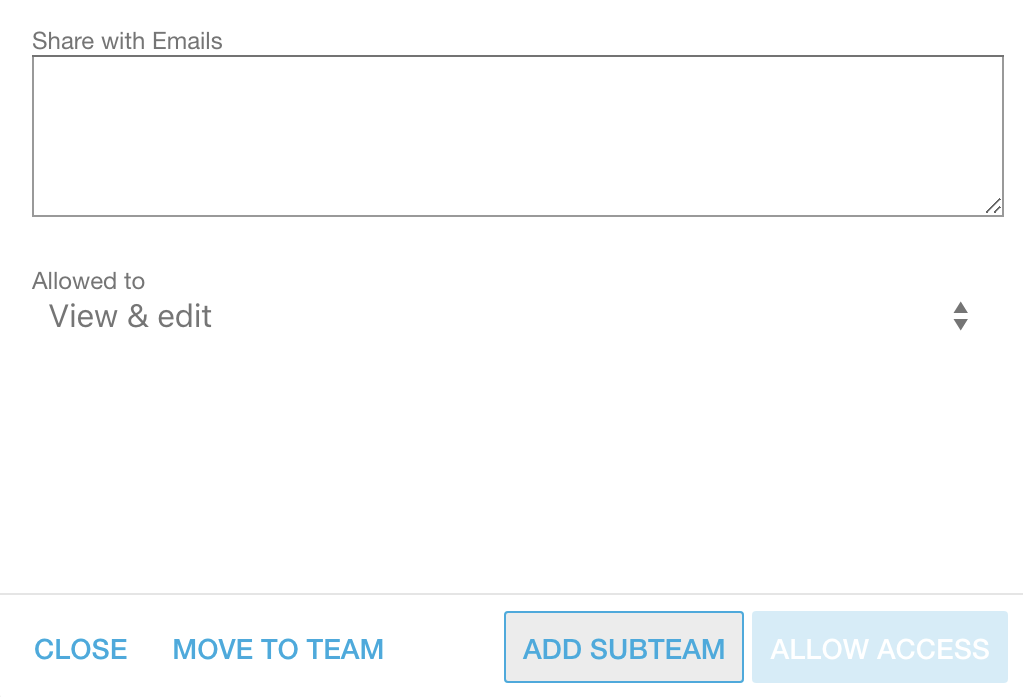
This will show a list of teams that you can share the map with. Click an icon next to the team to share a map with them.
- If you want the team members to only be able to view a map, click on the eye icon.
- If you want the team members to be able to edit the map as well, click on the pencil icon.
Deleting and un-deleting maps
To remove a file you no longer need, click on the File > Move to trash option in the main application menu, while editing a file. Trashed files will no longer be editable by collaborators, and they will not appear in your file main list. Instead, you can see trashed files by clicking on the Recycle bin icon in your files toolbar.
If you’ve trashed a file by mistake, you can easily restore it from the files page. Click on the recycle bin icon, then open the file. MindMup will offer to restore it. Files will stay in your Recycle bin for one month after deletion.
Disabling MindMup Cloud
For organisations subscribing to MindMup using GSuite/Google apps, administrators can disable access to MindMup cloud storage. This is useful if your regulatory or compliance constraints require to keep all data on Google Drive. Check out Controlling organisational access for more information.
Moving files from Google Drive to MindMup Cloud
If you have old maps on Google Drive, and you would like to move them to MindMup Cloud for easier collaboration, go to your file listing page, then select File -> Import From Google Drive in the main application menu.
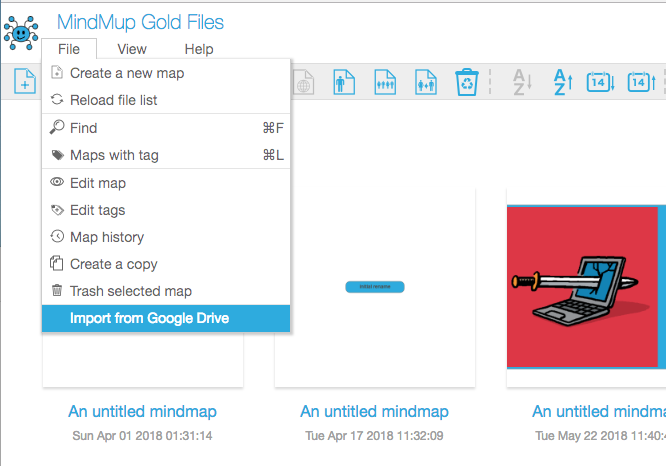
You’ll be asked to select a Google Account, then choose the files for importing. In the Google files pop-up, you can select several files at once for bulk-importing. Once the file list is displayed, just confirm these are the files you want to copy over to your MindMup Cloud storage, and the application will import them.
MindMup will automatically import embedded images and move them from Google Photos to your MindMup cloud storage. Other Drive documents, that are attached to your map nodes, will stay on Google Drive (MindMup does not have access permissions to read your attachments).
The maps are not shared automatically with the old collaborators, so you will separately need to share them.
Once the files are imported, they will show up in your file listing page, and you can also click on the eye icon next to each file to open it directly from the migration tool.